Last updated : Dec 12, 2021
1. update and upgrade your system
For that open up your terminal and type
sudo apt update && sudo apt upgrade
2. Install Nginx server
For that open up your terminal and type
sudo apt install nginx
3. Check whether Nginx is installed or not
Open up your web browser and type localhost in url bar and you will see the following output

4. Now install php and php-fpm for Nginx
There is very good repository for installing latest version of PHP i.e., php-8.0 known as Ondrej/php. So we will add this repo to the system first. Open up terminal again and type
sudo add-apt-repository ppa:ondrej/phpAfter adding repo update the system again and type
sudo apt install php8.0-fpm
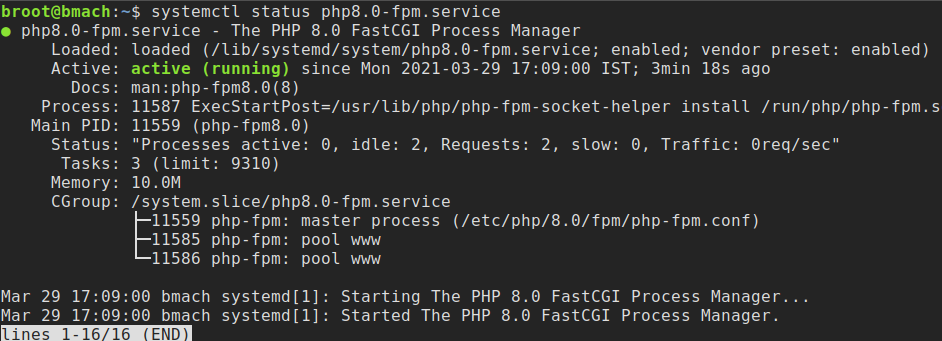
5. check whether php installed or not
Type in terminal
php -vand if you get the php version then PHP is installed correctly, if any error occurs you can comment and tell. After checking PHP installation now verify php-fpm installation, type in terminal
sudo systemctl status php8.0-fpmand you will get output something like this :
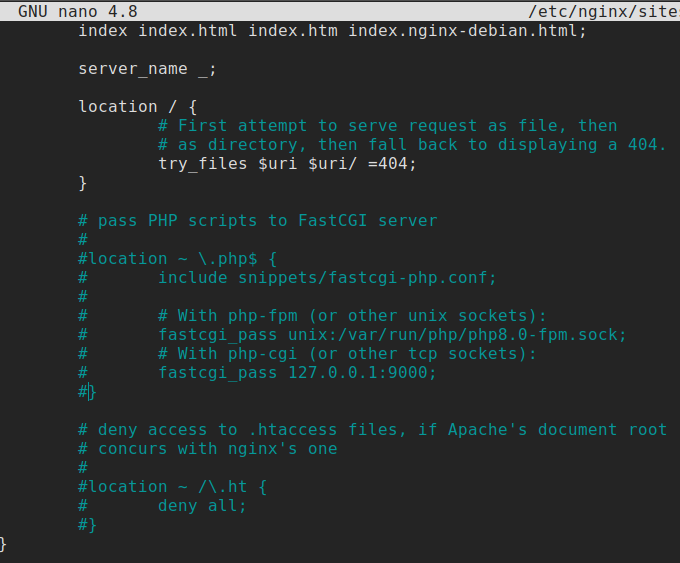
6. Till now no PHP page will run in browser
For running PHP pages we have to integrate php-fpm with Nginx. So type in terminal
sudo nano /etc/nginx/sites-enabled/default
you will see something like this :
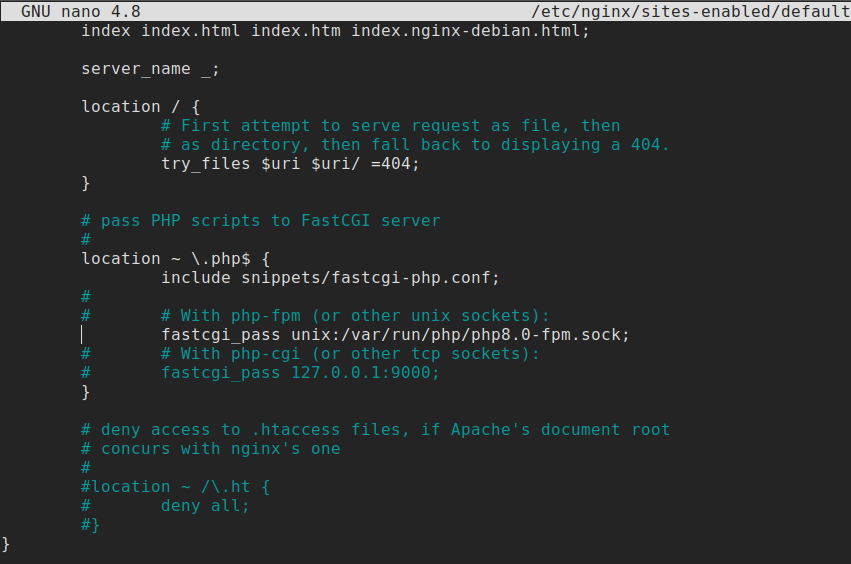
after editing some lines, this will be the updated file :
7. PHP installation is completed. Now it's time to install Mysql
So type in terminal
sudo apt install mysql-serverAfter running previous command, now install mysql with command
sudo mysql_secure_installation
Now it will ask you some questions:
1. (Validate password component) press Y for yes, any other key for no : Y
pres Y for this because it is really important to secure mysql database and this component will help you to enhance password security
2. now it will ask you to create a password for root user.
3. remove anonymous users : Y
4. disallow root login remotely : Y
5. remove test database and access to it : Y
6. remove privilege tables now : Y
All done!
8. Till now PHP and Mysql installation is complete and time to install phpmyadmin
So type in terminal
sudo apt install phpmyadmin
It will ask you for selecting server but as we are using Nginx so we will select just press tab key and return key.

then it will ask you configure dbconfig_common but select no and continue. Now copy phpmyadmin from /usr/share/ to /var/www/html/
PHPmyadmin installed. You can browse phpmyadmin at http://ip_address/phpmyadmin/index.php
9. But you will not be able to login with root username because we have disallowed that
so we have to create new user. type these commands
sudo mysql -u root -p
enter old password

create user 'new_root'@'localhost' identified by 'newrootroot';

grant all on *.* to 'new_user'@'localhost';

flush privileges;Sign in for comment. Sign in