- Home
- About
- Contact
- Sign in
- Projects
- Code Cabinet

Last updated : Dec 12, 2021

As the web has become the powerhouse of the software industry and primarily for those companies whose work is service based or freelance based work. Real time is the key component in almost all web apps now because each and every user wants information in real time.
So today we will see how to create real time notification in Laravel without Pusher. Let's start
First let's create a project in any drive.
laravel new realtime_notificationWe will use a very good and performant package called beyondcode laravel-webockets package. It is built on the top of pusher package. That's why it uses random pusher credentials to run. So let's add this package to our project.
composer require beyondcode/laravel-websocketsNow we need another package called pusher-php-server. Type in command
composer require pusher/pusher-php-serverNow open .env file in any code editor and find
BROADCAST_DRIVER=pusherPUSHER_APP_ID=12345
PUSHER_APP_KEY=12345
PUSHER_APP_SECRET=12345
PUSHER_APP_CLUSTER=mt1Now let's publish migration file for storing the details of laravel-websockets package.
php artisan vendor:publish --provider="BeyondCode\LaravelWebSockets\WebSocketsServiceProvider" --tag="migrations"Migrate the database now. Enter command
php artisan migrateNow let's publish config file for laravel-websockets package.
php artisan vendor:publish --provider="BeyondCode\LaravelWebSockets\WebSocketsServiceProvider" --tag="config"Now let's start websockets server and test that if it is working fine. enter command
php artisan websockets:serve
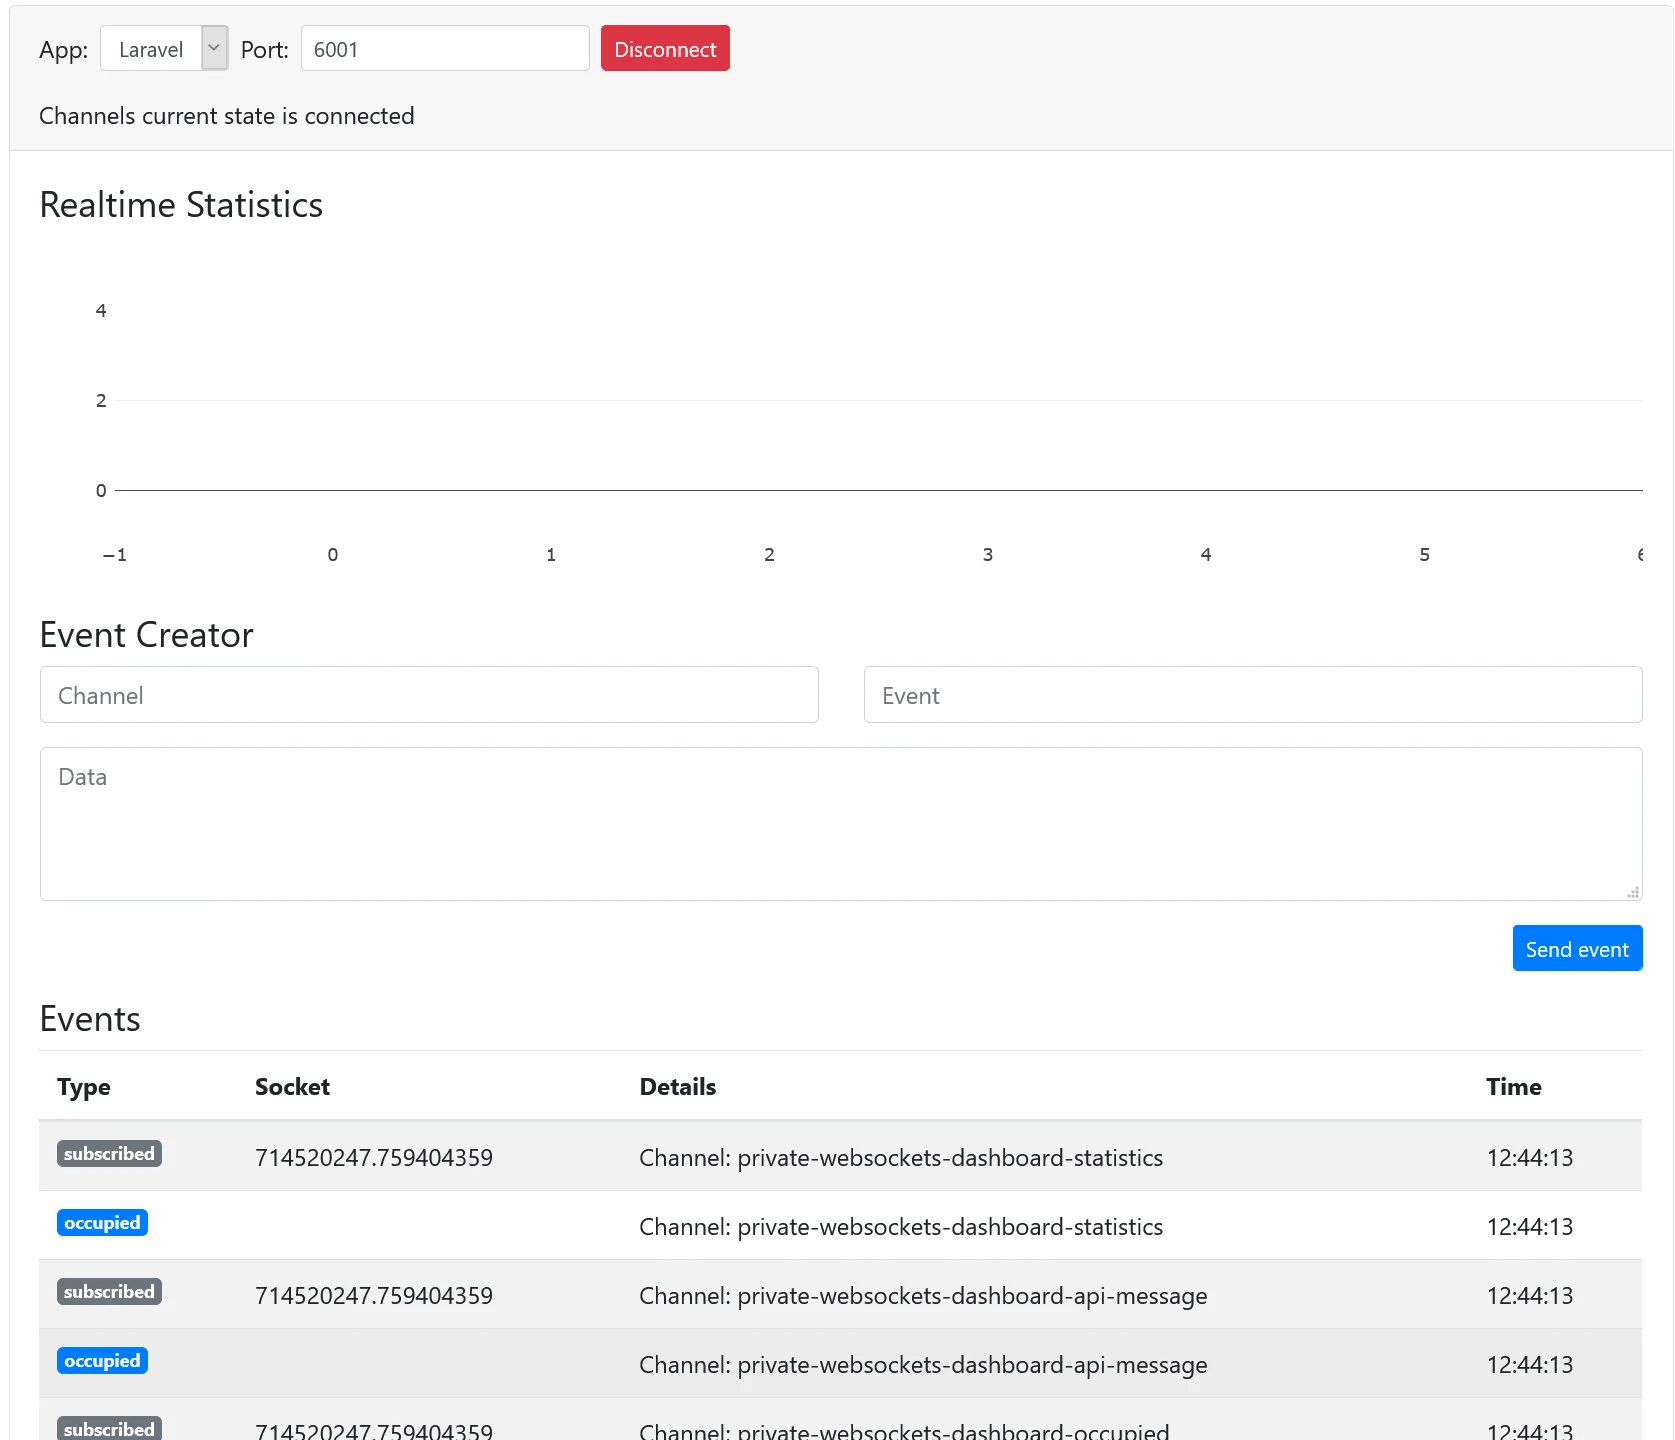
Open browser and enter http://127.0.0.1:8000/laravel-websockets and you will get a dashboard like this :

Now we will create an event which get triggered every time when notification has to be pushed. For that enter command
php artisan make:event RealTimeMessage
Open App/Events/
RealTimeMessage.php and type in the following code:
    <?php

    namespace App\Events;

    use Illuminate\Broadcasting\Channel;
    use Illuminate\Broadcasting\PrivateChannel;
    use Illuminate\Contracts\Broadcasting\ShouldBroadcast;
    use Illuminate\Queue\SerializesModels;

    class RealTimeMessage implements ShouldBroadcast
    {
        use SerializesModels;

        public string $message;

        public function __construct(string $message)
        {
            $this->message = $message;
        }

        public function broadcastOn(): Channel
        {
            return new Channel('events');
        }
    }
Go to config/broadcasting.php file and type in the following script in pusher block.
    'pusher' => [
        'driver' => 'pusher',
        'key' => env('PUSHER_APP_KEY'),
        'secret' => env('PUSHER_APP_SECRET'),
        'app_id' => env('PUSHER_APP_ID'),
        'options' => [
            'cluster' => env('PUSHER_APP_CLUSTER'),
            'encrypted' => true,
            'host' => '127.0.0.1',
            'port' => 6001,
            'scheme' => 'http'
        ],
    ],
Now we have completed the backend stuff now it's time to create frontend to receive the notification. We will be creating frontend in pure Javascript but it can be done in Laravel Echo.
Open resources/views/
welcome.blade.php and type in the following script.
<!DOCTYPE html> <html lang="{{ str_replace('_', '-', app()->getLocale()) }}"> <head> <meta charset="utf-8"> <meta name="viewport" content="width=device-width, initial-scale=1"> <title>Getting RealTime Notification</title> <meta name="csrf-token" content="{{ csrf_token() }}"> <link rel="stylesheet" href="https://maxcdn.bootstrapcdn.com/bootstrap/3.3.7/css/bootstrap.min.css"> </head> <body class="antialiased"> <div class="container"> <div style="display:none;" class="alert alert-success" id="notification_panel">kfdghfdkjgh</div> <div class="jumbotron" style="margin-top:15px;"> <h1 class="display-4">Realtime Notification</h1> <p class="lead">When you fire an event from websockets dashboard, you will receive notification here on the top.</p> </p> </div> </div> </body> <script src="https://ajax.googleapis.com/ajax/libs/jquery/3.5.1/jquery.min.js"></script> <script src="https://cdn.jsdelivr.net/npm/@popperjs/core@2.6.0/dist/umd/popper.min.js"></script> <script src="https://cdn.jsdelivr.net/npm/bootstrap@5.0.0-beta2/dist/js/bootstrap.min.js"></script> <script src="https://js.pusher.com/6.0/pusher.min.js"></script> <script>let a_tok = document.querySelector('meta[name="csrf-token"]').content; //suscribing to pusher channel Pusher.logToConsole = false; var pusher = new Pusher('12345', { cluster: 'mt1', broadcaster: 'pusher', //key: process.env.MIX_PUSHER_APP_KEY, //cluster: process.env.MIX_PUSHER_APP_CLUSTER, forceTLS: false, wsHost: window.location.hostname, wsPort: 6001, }); var channel = pusher.subscribe('events'); channel.bind('App\\Events\\RealTimeMessage',(d) => { if(d.msg == null || d.msg == ""){ $("#notification_panel").removeClass('alert alert-success'); $("#notification_panel").addClass('alert alert-danger'); $("#notification_panel").text('Notification was blank'); $("#notification_panel").fadeIn(); setTimeout(function(){ $("#notification_panel").fadeOut(); },2000); } else{ $("#notification_panel").removeClass('alert alert-danger'); $("#notification_panel").addClass('alert alert-success'); $("#notification_panel").text(d.msg); $("#notification_panel").fadeIn(); setTimeout(function(){ $("#notification_panel").fadeOut(); },2000); } });</script> </html>
Now scripting is done.
Its time to test. For testing open your app at 127.0.0.1:8000 in one window and laravel-websockets at 127.0.0.1:8000/laravel-websockets in another window.
Now in laravel websockets dashboard you will three fields :
In the first field type in the channel name you used in RealTimeMessage.php to broadcast your event.
In second field type in your event like this App\Events\RealTimeMessage.
And finally in the third field type in the message like this
{
        "msg":"this is sample notification"
    }
That is it for this article. Now you can also trigger the event from controller and also change the msg property text in json.
Sign in for comment. Sign in